Is a More Expensive Magnetic Knife Block Worth the Money?
This article is published by THMINS and includes a link to our own product on Amazon. As an Amazon Associate, we earn from qualifying purchases.
Compare the benefits you expect to use. AI-generated, unbranded concept scene; not a THMINS product photograph or performance comparison.
A more expensive magnetic knife block is worth considering when the extra cost buys something you will notice and use: a preferred finish, a suitable documented design, clearer support, or a feature that solves a real problem. A higher price by itself does not establish better holding performance, longer life, or easier daily use. Compare the actual benefits before treating the price as a shortcut for quality.
For a home cook replacing an adequate storage arrangement, this is a question about improvement. What will change enough to justify the purchase? For someone whose current arrangement does not suit their knives, the first priority is a workable replacement. Keeping those two situations separate helps prevent both overspending on extras and choosing a bargain that misses the reason for buying.
Buyer opinions show why value is personal
In a four-star imarku review labeled Vine, the reviewer liked the appearance and overall feel but questioned the price unless aesthetics were especially important to the buyer. The review concerned the 12.23-inch listed variant. It is one person’s assessment, and receiving a free product is relevant context when reading a price opinion. It does not establish what another shopper should pay. Value-related review.
A verified one-star HOSHANHO reviewer connected disappointment with the price paid, describing alignment concerns and the block tipping during knife removal. This is an individual account of a different product and variant, not a controlled comparison with the imarku block. Together, the comments illustrate two legitimate expectations: enjoying how a product looks and expecting its everyday function to work for the buyer. Price and expectation review.
Write down the job before comparing prices
Describe the change you want in one sentence. Perhaps you want to display three favorite knives, replace a slotted block that does not fit your collection, or simplify a crowded preparation area. That sentence becomes the standard against which you evaluate each option. A feature matters when it helps accomplish that job.
Then identify requirements that cannot be traded away. The intended knives must suit the holder, the setup must be appropriate for the kitchen, and the instructions must explain ordinary use. A discount cannot compensate for an unresolved compatibility question. Eliminate options that fail those requirements before comparing decorative details or bonus accessories.
This does not mean you need to buy the most expensive remaining model. If two options meet the same confirmed requirements, a lower-priced one may be the sensible choice. The purpose of the exercise is to make the reason visible, so you are choosing based on fit rather than assuming either the highest or lowest price represents value.
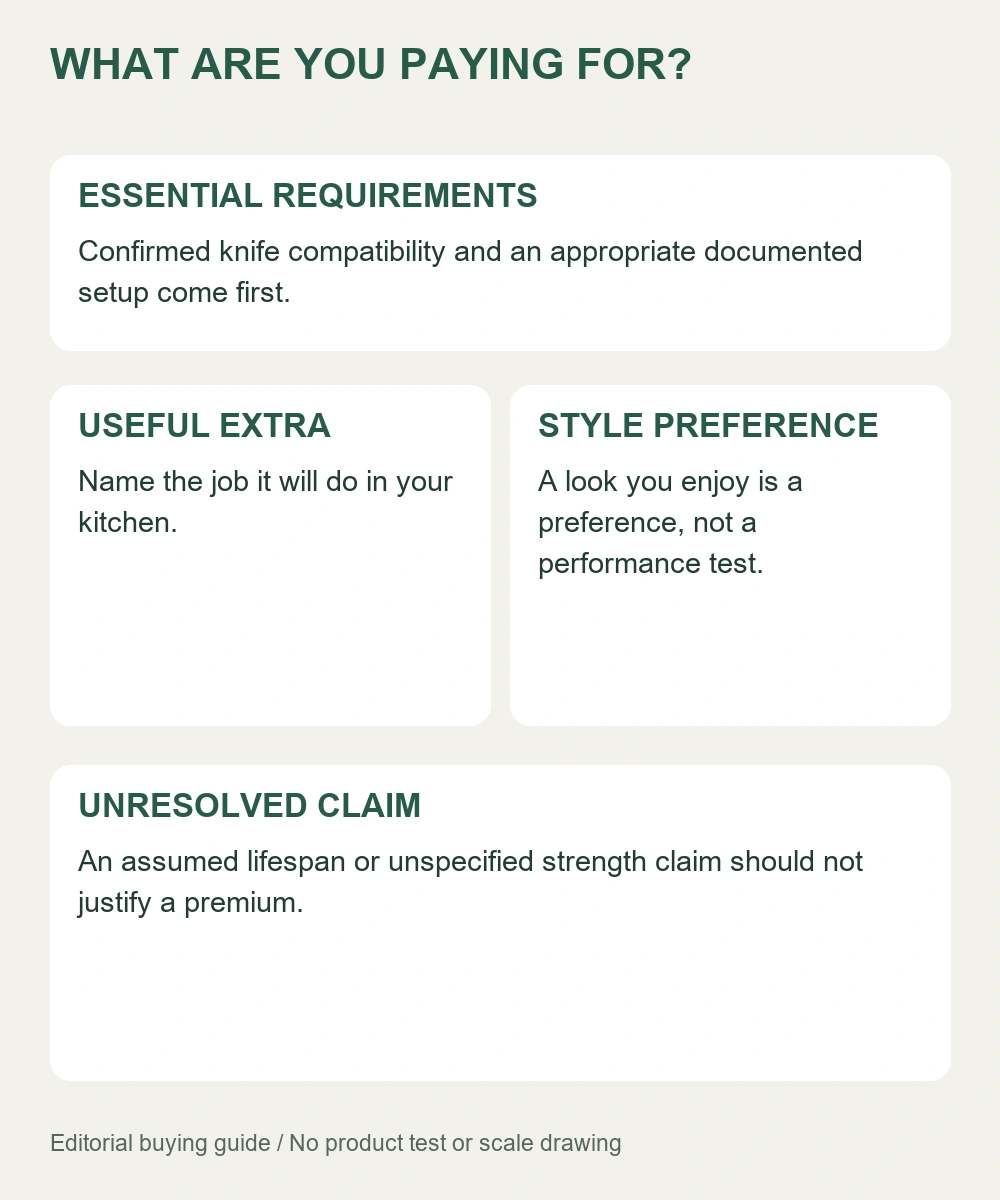
Confirm the essentials first, then decide which extras justify their cost; no prices or performance scores are implied.
Separate functional benefits from appearance preferences
A finish you enjoy seeing every day can be a valid reason to spend more. You do not need to disguise that preference as a performance claim. If the more expensive model coordinates with the kitchen and you prefer its detailing, describe the benefit honestly as appearance. Then decide how much that matters within your budget.
Conversely, do not assume that a darker stain, polished metal surface, or heavier-looking base proves a functional advantage. Photographs show appearance under particular lighting and styling. They cannot demonstrate a lifetime, quantify magnetic performance, or establish how the product behaves with your collection. Those questions need product-specific information.
A verified four-star imarku buyer liked the block overall while noting small finish defects. That report reminds shoppers that satisfaction and cosmetic reservations can coexist. It does not prove a general defect problem. If finish quality is the main reason you are considering a premium, inspect close-up photographs and clarify the seller’s approach to an item that arrives visibly different from the description. Finish-related comment.
Count only features you expect to use
Make a short list of the extras separating two candidates. These might include an integrated sharpener, a different storage arrangement, or an accessory compartment. Beside each extra, write the specific task it would perform in your kitchen. If you cannot name one, do not assign it much value simply because it makes the listing longer.
For example, an included sharpener may be irrelevant if you already use another suitable maintenance method. Extra advertised knife positions may be unnecessary if your daily collection is small. A different finish may matter more than both. This ranking is personal, but it becomes much easier to defend when each preference has a clear reason.
Also check what is actually included. Product photographs may show knives, utensils, or kitchen props that are not part of the offer. Compare the package contents for the selected variants rather than assigning value to everything visible in a lifestyle scene. If an accessory’s inclusion is unclear, ask before counting it toward the price difference.
Consider the effort attached to the purchase
Purchase value includes the work needed to get the product into normal use. Assembly, finding missing dimensions, obtaining care instructions, and resolving an unsuitable delivery all take attention. You do not need to convert that attention into an invented dollar amount. Simply recognize when a supposedly cheaper option requires more uncertainty than you want to manage.
Look for accessible instructions and a clear contact route. Check the current offer’s return arrangements, any stated warranty, and whether model-specific replacement parts are available. Record what is actually promised. Do not assume a recognizable brand or a higher price automatically means broader service terms, and do not present a seller’s promise as a guaranteed outcome.
An assembled product may save setup work for one buyer. Another buyer may be comfortable with a documented assembly and prefer the lower purchase price. Neither decision is wrong. The important distinction is between a task you knowingly accept and a problem you discover only after delivery.
Avoid invented lifetime savings
It is tempting to justify a premium by dividing the price across many years of imagined use. That can be a personal budgeting exercise, but it does not prove how long the holder will last. Unless there is reliable evidence for the exact model and conditions, do not treat a projected lifespan as a product fact.
Likewise, a few reports of scratches do not establish that a cheaper holder will need replacing soon. A cosmetic mark, a structural problem, and an unsuitable layout are different outcomes. Read the description of the issue rather than combining all complaints into a single durability score. Use specific concerns to ask better questions, not to manufacture a prediction.
The useful comparison is between what you know today: the current offer, the confirmed features, the documented instructions, and your actual needs. Leave unknown long-term performance marked as unknown. That produces a more honest decision than claiming one option will pay for itself through a lifespan no one has established.
Make a decision you can explain simply
Before checkout, finish this sentence: “I am choosing this model because it meets my requirements and the extra cost gives me this specific benefit.” If the only completion is “it seems more premium,” revisit the comparison. If the benefit is a finish you love, convenient setup, or a documented feature you will use, the reasoning is clearer.
When considering a THMINS magnetic knife block, compare the selected model’s current details at View the THMINS magnetic knife block on Amazon. This guide does not rank THMINS against competitors or claim that paying more guarantees performance. Choose the option whose confirmed benefits justify its cost for your kitchen, and leave unnecessary extras out of the decision.
Editorial evidence note: Review pages were read on November 17, 2026 (China time). Comments were selected by star rating and may concern different variants. They identify buying questions, not population-wide outcomes. Illustrations are concepts, not product photographs or test evidence.
How to Read Magnetic Knife Block Reviews Before You Buy
This article is published by THMINS and includes a link to our own product on Amazon. As an Amazon Associate, we earn from qualifying purchases.
Read the variant and situation behind each opinion. AI-generated concept scene; the laptop does not display real Amazon reviews.
The most useful magnetic knife block review is not necessarily the longest or the most enthusiastic. It is the one that describes a relevant product variant, a recognizable use situation, and an outcome you can compare with your own kitchen. Start there rather than treating the average star rating as a complete buying recommendation.
This is especially important on listings that combine several sizes or storage styles. A favorable comment about a wall-mounted strip may appear beside a countertop block, while a complaint may concern a different base or finish. Read the details below the review title before deciding whether the experience applies to the item in your cart. A few minutes of careful sorting can turn a confusing collection of opinions into useful questions for the seller.
First identify which product the reviewer received
Write down the selected variant’s name, dimensions as listed, and ASIN before opening the reviews. Then check the variant label attached to each relevant comment. The product title at the top of the review page does not necessarily mean every review below it concerns that exact configuration.
In our reading of an imarku review page, a five-star comment about easy installation carried a 15.94-by-2.60-by-0.91-inch variant label and linked to a different ASIN from the countertop block. That entry was excluded from the countertop buying evidence. Its presence does not make the review improper; it means the shopper needs to match the experience to the product type. Different-variant example.
When a variant label is absent, do not fill the gap from the current product image. The reviewer may be discussing a different option or an older configuration. Keep that account separate until the product can be identified. This is particularly useful when the text describes slots, mounting, or another feature that does not match the selected magnetic block.
Read positive and negative comments for different reasons
Four- and five-star comments help identify what buyers value: seeing their knives, enjoying the appearance, or keeping frequently used tools organized. One- and two-star comments can reveal where expectations fail, such as assembly, surface condition, or access with a particular knife. Neither group should be read as a complete description of the product.
Look inside positive reviews for reservations. A four-star imarku buyer appreciated the convenient sharpener but wondered whether the magnet would weaken over time. The comment expressed a future concern, not an observed loss of holding strength. Turning that question into a claim that the magnets had weakened would misrepresent what the reviewer wrote. Concern within a positive review.
Likewise, a low rating can contain useful praise. A HOSHANHO buyer liked aspects of the materials and magnets but could not assemble the pieces. That is a more specific problem than saying every aspect of the holder was poor. Preserve the distinction when deciding what needs further investigation. Assembly-related account.
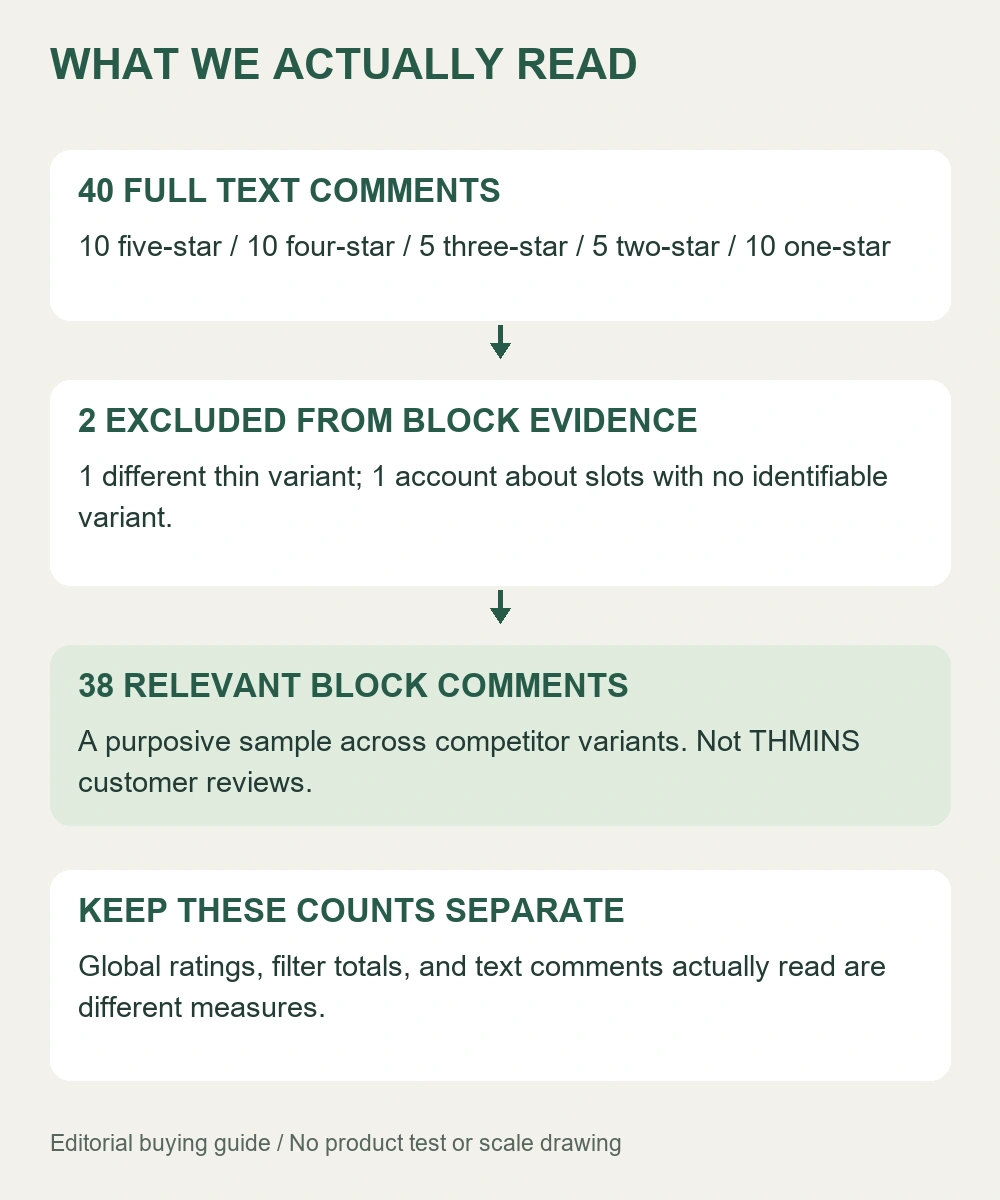
This is the evidence sample used for these five guides, not a defect-rate estimate or the listing’s rating distribution.
Separate the observation from the explanation
A reviewer may accurately report a visible mark while guessing why it appeared. They may describe a knife moving and then infer how the magnets are arranged inside the block. The observed event and the proposed cause are different kinds of information. You can take the experience seriously without adopting an explanation that has not been verified.
For example, “the base moved when I removed my chef’s knife” raises a useful question about that combination and removal method. It does not by itself establish the internal design, the magnet grade, or whether every unit behaves that way. Ask for the knife type, variant, and ordinary setup conditions where those details are available.
Be equally careful with praise. “Very strong” is a buyer’s impression unless it accompanies a defined measurement with relevant conditions. It is not a capacity specification for your knives. Positive and negative descriptions become more useful when you retain what was actually observed and leave unsupported causes or universal conclusions out of the comparison.
Treat review labels as context, not a verdict
Record whether the page labels a comment Verified Purchase or Vine. Those labels help you understand the review’s context, but they do not make its conclusion automatically applicable to your kitchen. A verified buyer can use a different knife collection, and a Vine reviewer can still describe a relevant practical limitation.
In the ten four-star imarku comments we read, three were labeled Verified Purchase and seven were labeled Vine. That composition describes this particular sample, not the whole listing or all customers. Keeping the labels attached to the comments prevents a small selected group from being presented as an undifferentiated body of buyer experience.
The content still matters. A detailed account that identifies the variant and explains the situation may help you ask a useful question, regardless of whether you agree with the reviewer’s preference. A short statement such as “love it” tells you the person was pleased but gives little guidance about whether your longest knife or preferred layout will work.
Do not turn the rating chart into a failure rate
During our reading, the HOSHANHO page displayed 4.7 out of 5 from 3,006 global ratings. The selected critical filter reported 220 matching customer reviews, but we read only the ten visible entries on that page before separately reading ten one-star entries. Those are different quantities: an overall rating total, a filter’s reported count, and the text actually examined.
The global figures may cover pooled variants, and the review sample is deliberately selected by rating. It cannot tell us what percentage of delivered blocks have a particular problem. Ten low-star accounts are useful for identifying questions; they are not a random sample from which to calculate a defect rate. The same limitation applies to a handpicked group of glowing reviews.
Also distinguish platform-generated summaries from individual comments. A summary can help locate topics, but it is not another buyer and should not be counted as a text review. Follow a topic back to the actual comments and inspect the product variants before relying on it for a purchase decision.
Turn each relevant comment into a question
Use a simple note with four fields: the product variant, the reported situation, the outcome, and the question it creates for you. A report about uneven feet becomes a question about the intended base contact and replacement parts. A complaint about a logo becomes a request for a clear current photograph. A comment about a particular long knife becomes a compatibility inquiry using your knife’s model.
This approach is more productive than collecting dramatic adjectives. It also helps you notice when two apparently conflicting reviews describe different conditions. One owner may be delighted with small everyday knives while another struggles with a different collection. You do not have to decide that one person is wrong to recognize that their situations differ.
Keep the questions short when contacting the seller. Include the exact selected listing and the details relevant to your concern. Ask for specifications, instructions, or photographs that can resolve the uncertainty. A general reassurance about quality is less helpful than an answer addressing the actual scenario.
Compare THMINS using its own verified details
Competitor reviews can help you discover what to check, but they do not prove how a THMINS magnetic knife block performs. Keep product-specific praise and criticism attached to the brand and variant that received them. Do not transfer a competitor’s dimensions, accessory list, or reported problem to a THMINS listing.
When you are ready to compare a THMINS option, open the current product information at View the THMINS magnetic knife block on Amazon. Match the selected variant to your requirements and use your review notes to resolve unanswered questions. The goal is a purchase supported by relevant details, not a decision based on whichever star rating or dramatic comment you happened to read first.
Editorial evidence note: Review pages were read on November 17, 2026 (China time). Comments were selected by star rating and may concern different variants. They identify buying questions, not population-wide outcomes. Illustrations are concepts, not product photographs or test evidence.
Is a Magnetic Knife Block a Good Gift for a Home Cook?
This article is published by THMINS and includes a link to our own product on Amazon. As an Amazon Associate, we earn from qualifying purchases.
Plan the gift around the recipient. AI-generated, unbranded concept scene; not actual THMINS packaging or a product photograph.
A magnetic knife block can be a thoughtful kitchen gift when the recipient wants open knife storage and has a suitable place for it. It is a less reliable surprise when you know only that the person enjoys cooking. Knife collections, counter arrangements, and preferences about visible tools are personal. The best gift decision begins with a few quiet checks about the recipient’s habits, followed by a choice they can exchange if needed.
Think of the block as something that will participate in a daily routine, not simply decorate the kitchen on the day it is unwrapped. Its appearance matters, but so do the knives it will hold, the way the recipient reaches for them, and whether the gift creates extra work. A practical present should make sense after the ribbon is removed.
What gift-related feedback can and cannot tell you
One four-star Amazon reviewer of an imarku block said it was a gift for a relative who liked displaying knives. The review was labeled Vine, and the listed variant measured 12.23 by 4.07 by 10.21 inches. The reviewer liked the appearance while raising concerns about the base and the included sharpener. That individual account captures both sides of the gift decision: the concept can suit the recipient, while the particular design still needs scrutiny. Gift-related review.
A separate verified five-star review of that listed size praised its appearance and ability to hold the owner’s collection. Neither account tells us that every home cook wants a display block. They support asking whether visible knife storage is something this recipient already values. These are competitor comments, not reviews of THMINS. Positive owner comment.
Find out whether the recipient wants open storage
Start with what the person already uses. Someone who proudly arranges favorite knives may welcome a magnetic display. Someone who keeps counters deliberately empty may prefer drawer storage even if they admire the same product in a photograph. A gift should not require changing a settled preference simply to accommodate the object.
You can ask about a kitchen improvement without naming the exact present: is there any storage the person wants to change? If they mention crowded knife slots or wanting to see their collection, you have a useful lead. If they say their current arrangement works well, consider another gift or let them choose the storage model themselves.
Household circumstances matter too. Open blades may be unsuitable where access cannot be managed appropriately. Do not assume a holder belongs on an island just because the counter looks spacious. The recipient is best placed to judge who uses the room and whether visible, accessible knife storage fits that household. Respect that decision rather than treating a display as automatically desirable.
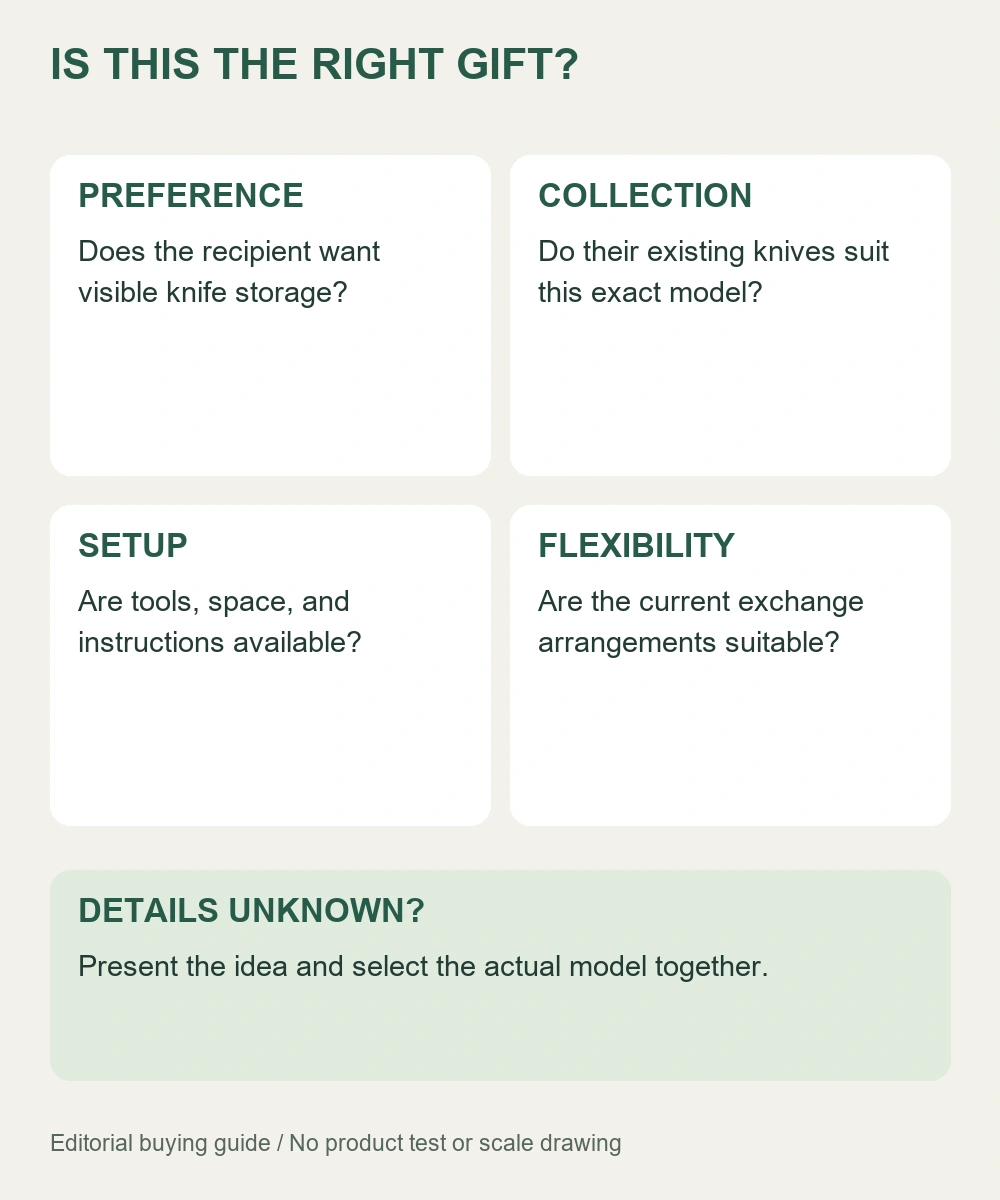
Use the recipient’s preferences to decide whether to select a model or choose one together.
Learn enough about the knives without buying new ones
A holder is often a better gift when it serves knives the recipient already likes. Ask for the knife models or a description of the everyday collection. If a long slicer, broad cleaver, or unusual handle is central to the routine, the seller should address that specific fit before you choose the block.
Do not add an unfamiliar knife set simply to make the gift look complete. The recipient may have carefully chosen blades and no interest in replacing them. An empty holder can be a complete gift when its purpose is to organize that existing collection. Confirm whether the listing includes knives, accessories, or only the holder so the presentation does not create a mistaken expectation.
If you cannot obtain the necessary details without spoiling the surprise, a shared selection process may be preferable. You can present the idea with a card and choose the actual model together afterward. That keeps the thoughtfulness of the gift while letting the person who will use it resolve compatibility and layout questions.
Choose the look from the recipient’s preferences
Pay attention to the objects the recipient already displays, including whether they prefer natural wood, dark surfaces, or visible brand marks. “Modern” and “minimalist” are broad labels. They do not tell you whether a particular logo, grain pattern, or glossy finish will feel welcome in that person’s kitchen.
Two four-star imarku reviewers in the sample liked aspects of their blocks but disliked the prominent branding. Both comments were labeled Vine and concerned different listed sizes. That is a preference signal, not evidence that branding is a defect. For a gift, it is a reminder to inspect the actual face of the product rather than looking only at the overall silhouette. Branding preference comment.
Ask for current photographs of the selected version if branding or finish is important. Concept images, including the illustrations in this guide, do not establish the appearance of a delivered product. If considering a THMINS magnetic knife block, compare its actual current listing photographs with the recipient’s taste instead of assuming that a generic black holder represents that model.
Avoid giving an unexpected setup project
Check assembly requirements before buying. A small collection of parts can be straightforward for one person and inconvenient for another, particularly if tools are not available. Confirm which components arrive separately and whether the instructions are accessible. If the recipient values immediate readiness, that can be a meaningful reason to prefer an assembled option.
Timing also matters. A gift purchased well before a holiday may be opened much later than the order date. Review the actual seller’s current exchange and return terms before ordering, especially how the recipient would handle a problem. Do not assume a gift receipt automatically extends a deadline or that every marketplace seller follows identical arrangements.
Keep the model information and instructions with the present. If you inspect an empty holder before wrapping it, retain the supplied protective packaging and parts. Do not load it with loose knives for an attractive presentation. The recipient should be able to identify the product and complete its setup without searching through discarded wrapping for a small component.
Decide whether extras add value for this person
An integrated sharpener may sound like an impressive bonus, but it is useful only if it suits the recipient’s knives and preferred maintenance routine. A person who uses a professional sharpening service may not want another tool. A cook with specialized blades may need a different method altogether. More features do not automatically make a better gift.
The same reasoning applies to advertised capacity. A large block may be unnecessary for someone who cooks with three favorite knives. Avoid choosing the biggest model simply because it looks more substantial in the box. The gift’s value lies in fitting the recipient’s life, not maximizing the number of specifications on the listing.
Leave room for the recipient to make the final choice
A useful gift note can say that you chose the holder because the recipient enjoys cooking and that exchanging the size or style is welcome. That removes the pressure to keep an unsuitable object on the counter. It also makes the present feel considered rather than prescriptive.
Choose a magnetic knife block as a gift when the recipient wants this storage style, the selected model fits their collection, and the setup and exchange arrangements are clear. If any of those remain uncertain, choose together. For a THMINS option, review the selected model at View the THMINS magnetic knife block on Amazon and confirm the relevant details before ordering. A gift that fits is more useful than a surprise that needs a new kitchen routine.
Editorial evidence note: Review pages were read on November 17, 2026 (China time). Comments were selected by star rating and may concern different variants. They identify buying questions, not population-wide outcomes. Illustrations are concepts, not product photographs or test evidence.
Magnetic Knife Block With a Sharpener: Is the Extra Feature Worth It?
This article is published by THMINS and includes a link to our own product on Amazon. As an Amazon Associate, we earn from qualifying purchases.
Storage and sharpening are separate buying decisions. AI-generated, unbranded concept scene; not a THMINS product photo or test.
A magnetic knife block with a built-in sharpener promises an appealing arrangement: the knives you use every evening and a maintenance tool live in one place. That can sound especially useful when a drawer already holds too many small accessories. Before paying for the combination, however, ask whether the sharpener suits your knives and whether you would actually use it. A storage feature and a sharpening feature deserve separate buying decisions.
The right answer is sometimes yes. A clearly documented, compatible sharpener may fit an established routine. In other kitchens, a plain magnetic block plus the sharpening method the owner already trusts is the better purchase. The extra feature earns its place through compatibility and convenience, not merely by appearing in a product title.
What the buyer comments actually tell us
The Amazon comments we read about imarku magnetic blocks were mixed on this detail. A verified four-star buyer of the 13.22-inch listed variant appreciated the convenient integrated sharpener. A different four-star reviewer, labeled as receiving a free product through Vine and reviewing the 12.23-inch variant, liked the block but disliked its sharpener. These are individual experiences with competitor products, not tests of THMINS equipment. Their disagreement suggests a useful question: what does the added tool contribute to your particular knife-care routine? Convenience comment, critical comment within a positive review.
Neither comment identifies a result that every buyer should expect. The products also had different listed dimensions. Rather than averaging the two opinions into a verdict, use them to identify the information missing from a shopping page: supported blade types, operating instructions, and the role of each sharpening stage.
Start with the knives, not the accessory count
Imagine a home cook whose everyday collection contains a chef’s knife, a serrated bread knife, and a small utility knife. A picture showing all three attached to a magnetic block does not establish that all three can pass through its sharpening slot. Storage compatibility and sharpening compatibility are different questions. Write down the exact knife models before comparing the accessory descriptions.
This distinction has practical support in manufacturer guidance. Kai describes one of its pull-through sharpeners as intended for particular straight-edged, double-bevel blades and explicitly excludes several other blade types, including serrated and single-bevel knives. That restriction belongs to that specific sharpener; it illustrates why the instructions matter rather than establishing the specification of an unrelated built-in unit. Kai sharpener guidance.
Ask the block seller for the sharpener’s own instructions if they are missing. A general phrase such as “for kitchen knives” is not enough to resolve a question about a particular edge. If the knife manufacturer and accessory instructions do not establish compatibility, leave that knife out of the sharpening process and seek clarification.
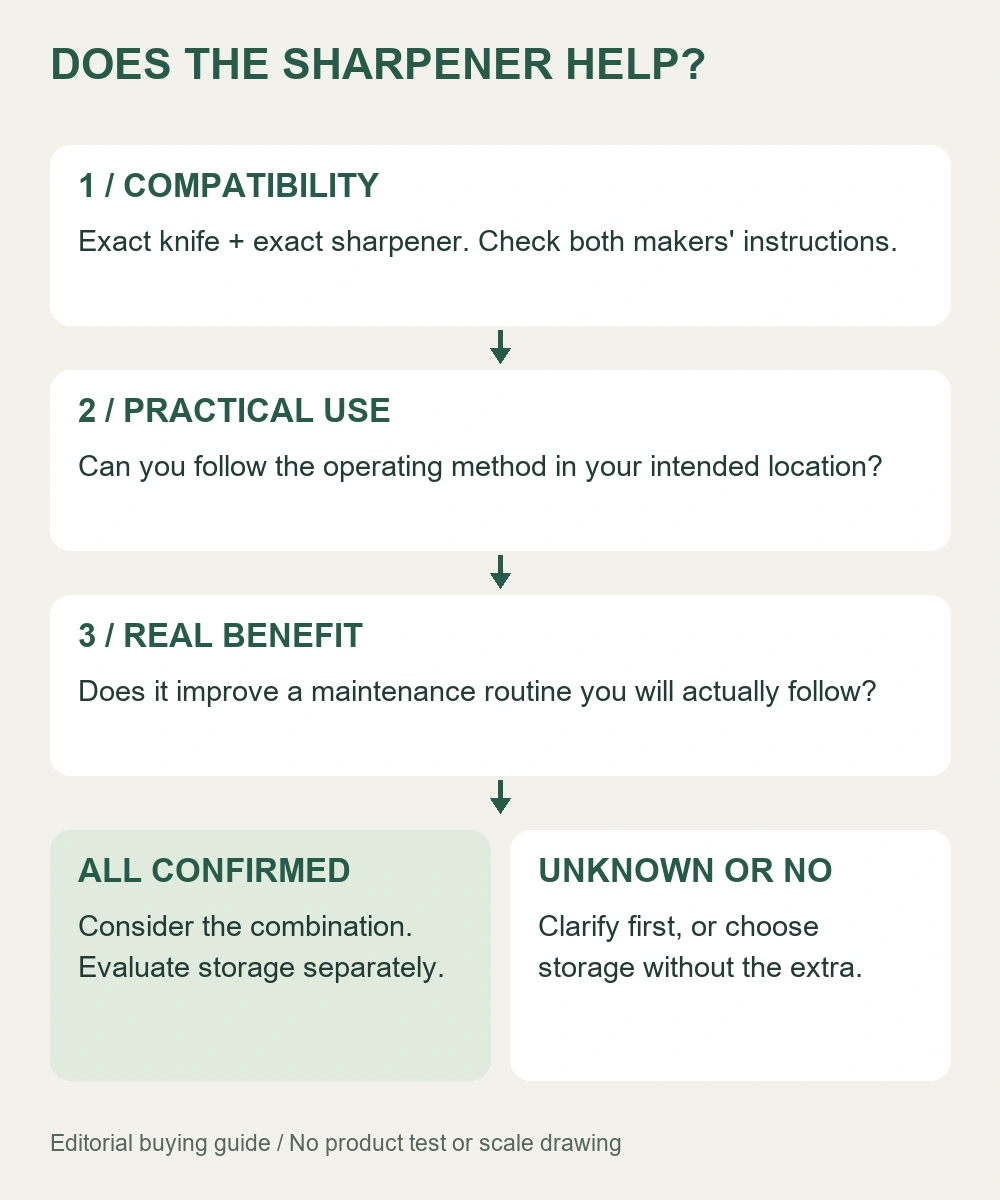
A compatibility-first decision flow; this is a buying aid, not a sharpening procedure.
Compare the feature with your existing routine
Think about the last time you maintained a knife. Did you use a tool you already own, visit a local sharpening service, or send the knife to its manufacturer? If that arrangement works well, an integrated sharpener may add very little. There is no reason to change a successful routine merely because a new storage product includes another option.
Now consider someone who has no routine at all. A built-in accessory can make the need for maintenance more visible, but visibility does not replace instructions or practice. Before choosing the combination, decide where you will learn the approved method, how you will identify compatible knives, and how you will keep the tool ready for use. Buying more functions is only helpful when those functions can be used appropriately.
Do not assume that storing a knife beside a sharpener means sharpening it every time it is returned. Frequency and technique should follow the relevant knife and tool guidance. This article is a buying guide, not a sharpening procedure, and an Amazon review is not a substitute for either manual.
Look closely at the location of the sharpener
The accessory’s position matters as much as its presence. Look for a clear picture of the complete block and instructions showing how the sharpener is used. Ask whether knives must be removed from the storage faces first, where the user’s hands belong, and how the block is supported during the operation. Do not infer those details from a close-up that crops out the base.
In a kitchen where the block sits near a backsplash, a side-mounted feature may be less accessible than it looks in a studio photograph. On an island, the same location may be easier to approach but closer to another person’s work area. Evaluate the intended setup without trying out uncertain movements around exposed blades. Missing operating guidance is a reason to ask the seller, not to improvise a technique.
Also check how the accessory is maintained and whether any consumable or replaceable part can be obtained separately. If the sharpener eventually needs attention, you should know whether that affects the storage function or simply means using another sharpening method. Do not assume that an integrated part is removable because a seam is visible in a photograph.
Give storage performance its own decision
A sharpener cannot compensate for a block that does not suit your collection. First establish that the intended knives can be stored and retrieved according to the holder’s instructions. Then evaluate the accessory. This order keeps a bonus feature from distracting you from the product’s primary purpose.
For example, a shopper may be choosing between a straightforward holder that fits three daily knives and a combination model whose advertised capacity is larger. If the shopper does not need extra positions and already owns a compatible maintenance tool, the larger feature list may bring no practical benefit. Conversely, a compatible integrated tool could be attractive when it replaces a genuinely inconvenient separate accessory. Neither conclusion requires declaring one format universally better.
Keep any comparison with THMINS equally specific. Check the current THMINS magnetic knife block listing for the selected model and included components. Do not assume that a competitor’s sharpener, material, or maintenance arrangement is included with a THMINS holder. Compare confirmed features rather than transferring details from one brand’s pictures to another.
A short message that gets a useful answer
Send the seller a focused question: “I own these knife models. Which are compatible with the included sharpener, and can you provide its operating and maintenance instructions?” Include whether any knife is serrated or has a special edge configuration according to its maker. You do not need to describe the whole kitchen before asking this first question.
If the answer is simply that the magnet is powerful, the sharpening question remains unanswered. Follow up about the accessory itself. If the seller supplies a clear manual, compare it with the knife manufacturer’s guidance. This gives you something more dependable than a broad claim that the product is multifunctional.
Buy the combination only when both parts help
Choose a magnetic knife block with a sharpener when its storage layout works, its sharpening compatibility is documented, and the added tool serves a routine you intend to follow. Choose a simpler holder when sharpening is already handled well elsewhere or the accessory’s suitability remains unclear. An unused bonus should not decide the purchase.
If you are considering THMINS, review the current model’s storage details and included parts at View the THMINS magnetic knife block on Amazon. Build your purchase around the knives you own and the maintenance method they require. The best combination is the one whose separate functions both have a clear place in your kitchen.
Editorial evidence note: Review pages were read on November 17, 2026 (China time). Comments were selected by star rating and may concern different variants. They identify buying questions, not population-wide outcomes. Illustrations are concepts, not product photographs or test evidence.
Assembled or Assembly-Required Magnetic Knife Block: Which Should You Buy?
This article is published by THMINS and includes a link to our own product on Amazon. As an Amazon Associate, we earn from qualifying purchases.
Consider the setup work before checkout. AI-generated, unbranded concept scene; the parts and leaflet do not represent THMINS assembly instructions.
An assembly-required magnetic knife block can be a reasonable purchase when its parts, instructions, and support are clear. An assembled model can be more convenient when you want to avoid a small setup project. Neither description proves quality by itself. The useful buying question is whether the amount of work and uncertainty suits the person who will receive and use the holder.
This matters when a block arrives before a busy holiday meal, goes to a college apartment, or is purchased for someone who does not keep tools at home. A listing photo generally shows the finished product. It may say little about the parts inside the box or what happens when they do not fit. Check those details before treating two similar-looking blocks as interchangeable purchases.
Why assembly deserves attention before checkout
In the HOSHANHO reviews we read, one verified two-star buyer said the product looked attractive but the pieces would not fit together. A verified one-star buyer of the same listed 14-by-10-by-4.5-inch variant also described pieces that would not slide into place, despite liking the magnets and wood. These accounts identify an assembly concern; they do not establish how frequently it occurs or describe THMINS products. Two-star account, one-star account.
A positive rating is not an assembly guarantee either. Another model’s owner may have received a fully assembled holder, a different base design, or a different set of parts. When comparing feedback, match the variant and the setup described. “Easy to use” after assembly and “easy to assemble” are separate observations.
Ask what arrives in the box
Start with a simple question: does this exact variant arrive ready to stand on the counter, or does the buyer attach the base, feet, guard, or another structural component? Then ask for the parts list and instruction sheet. A statement that assembly is easy is less useful than knowing which connections you will be asked to make.
Check whether the required tool is included and whether an ordinary household tool is specified. Do not assume that every screw head accepts the same screwdriver or that a power driver is appropriate. The instructions should explain the intended setup. If a seller cannot provide them before purchase, record that as an unresolved detail rather than guessing from customer photographs.
For a gift, the distinction is particularly important. The recipient may not have a suitable workspace or tools available on the day they open it. A ready-assembled product may justify a preference for convenience, while an assembly-required design may be entirely acceptable to someone who is comfortable with the documented task. The choice depends on the recipient, not on whether assembly sounds easy to the buyer.
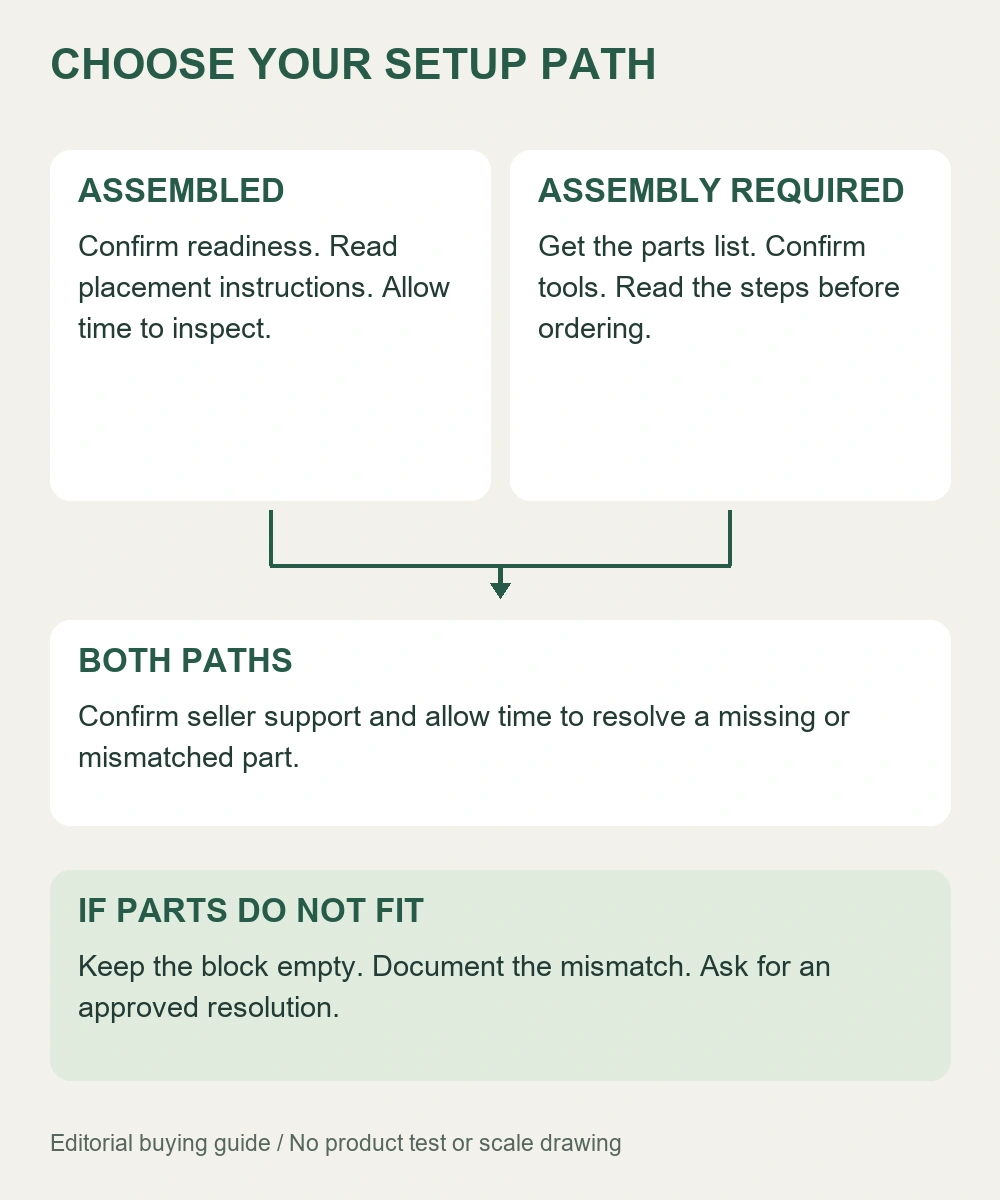
Two purchase paths with different setup needs; neither path establishes product quality.
Separate a manageable task from a repair project
Putting supplied parts together according to clear instructions is different from correcting holes that do not align or altering a joint that will not fit. The first is ordinary setup. The second raises a product-condition question for the seller. Do not budget your time on the assumption that you can repair any mismatch after delivery.
Before ordering, ask how the seller handles missing hardware, an absent foot, or a component that cannot be assembled as shown. Is a model-specific replacement part available? Would the entire item need to be returned? The relevant terms are those displayed for the actual offer at purchase time; they can differ by seller and change later. Keep a copy of the order details and instructions for reference.
A verified one-star HOSHANHO reviewer reported separate problems involving a missing pad and mismatched parts across two deliveries. That is one buyer’s account, not a measured defect rate or a prediction about another order. It does explain why replacement-part support is a meaningful question before checkout. Parts-related review.
Think about when you need the holder
Suppose you want the new knife storage ready for Thanksgiving cooking. Ordering a model that requires assembly on the evening before guests arrive leaves little time to resolve a missing part. Even an assembled item deserves time for an ordinary condition check. Build some flexibility into the purchase rather than letting the meal deadline pressure you into using an incomplete setup.
The same principle applies to a move. If the household tools are packed and the kitchen counter is covered with boxes, an assembly-required holder may create an avoidable task. You can still choose it, but plan to assemble it when the workspace and instructions are available. Until then, keep knives in their existing suitable protected storage instead of treating the unpacked parts as a temporary stand.
This is a purchasing decision about timing, not a claim that assembly-required models are inferior. A buyer who enjoys a straightforward documented setup may see no disadvantage. A buyer who values immediate readiness may reasonably pay attention to assembly status even when the finished designs look similar.
Compare construction details without inventing conclusions
Pictures can help you identify joints and separate components, but they cannot prove that a connection is well made. Ask for a view of the base connection and the underside. Look for consistency between the selected variant, the manual, and the product images. If those disagree, clarify which construction will be delivered.
Avoid treating a screw count as a quality ranking. More hardware does not automatically mean a better holder, and fewer visible parts do not establish durability. Similarly, a one-piece appearance may conceal attached components. Base your comparison on the actual documented setup and support rather than assumptions about how the object was manufactured.
When comparing a THMINS magnetic knife block, verify the assembly requirements for the specific listing. The competitor comments discussed here do not establish whether a THMINS model arrives assembled, which tools it needs, or whether its parts share the same design. Those are product facts to confirm directly.
What to do if the delivered parts do not fit
Keep the block empty and pause the setup. Recheck the model, supplied components, and orientation against the instructions. If the mismatch remains, photograph the relevant parts without knives present and contact the seller. Describe what does not align rather than diagnosing a manufacturing cause you cannot verify.
Do not sand a joint, enlarge a hole, substitute random screws, or add an improvised pad merely to complete the assembly. Such changes can make the condition harder to assess and may alter how the holder works. Seek the manufacturer’s resolution while the original parts and packaging are available. There is no need to load knives to demonstrate that an empty assembly is incomplete.
For a broader inspection after setup, use our first-use checklist. That is the next stage. The decision in this guide comes earlier: choosing a product whose assembly demands fit your circumstances.
Choose the level of setup you actually want
Buy an assembly-required model when the instructions are clear, the required tools are available, and there is a practical route to resolve missing or mismatched parts. Prefer an assembled option when minimizing setup is a meaningful benefit for you or the recipient. Neither choice removes the need to verify the delivered product’s condition.
For a THMINS option, check the selected model and its current included-parts information at View the THMINS magnetic knife block on Amazon. Confirm readiness, support, and timing before comparing appearance. A good purchase should arrive with a manageable plan for getting from the shipping box to normal kitchen use.
Editorial evidence note: Review pages were read on November 17, 2026 (China time). Comments were selected by star rating and may concern different variants. They identify buying questions, not population-wide outcomes. Illustrations are concepts, not product photographs or test evidence.
Building a Wash Dry and Store Routine for Kitchen Knives
AI-generated concept illustration; not a THMINS product photograph, installation diagram or performance test.
A knife storage routine begins before the knife reaches its holder. Decide how it moves from food preparation to cleaning, drying and its normal storage position. This helps prevent clean knives being mixed with washing-up clutter or left in an unexpected place.
Follow the knife maker for cleaning
Use the care instructions for the actual knife, including any requirements for its handle material. ZWILLING, for example, recommends hand cleaning with lukewarm water, mild dish soap and a non-scratch cloth or sponge. That knife-care advice does not automatically approve the same cleaning method for a wooden magnetic holder. ZWILLING knife care.
Keep a knife visible and separate while attending to it. Avoid leaving it concealed under dishes or in water where another person might reach without seeing the blade.
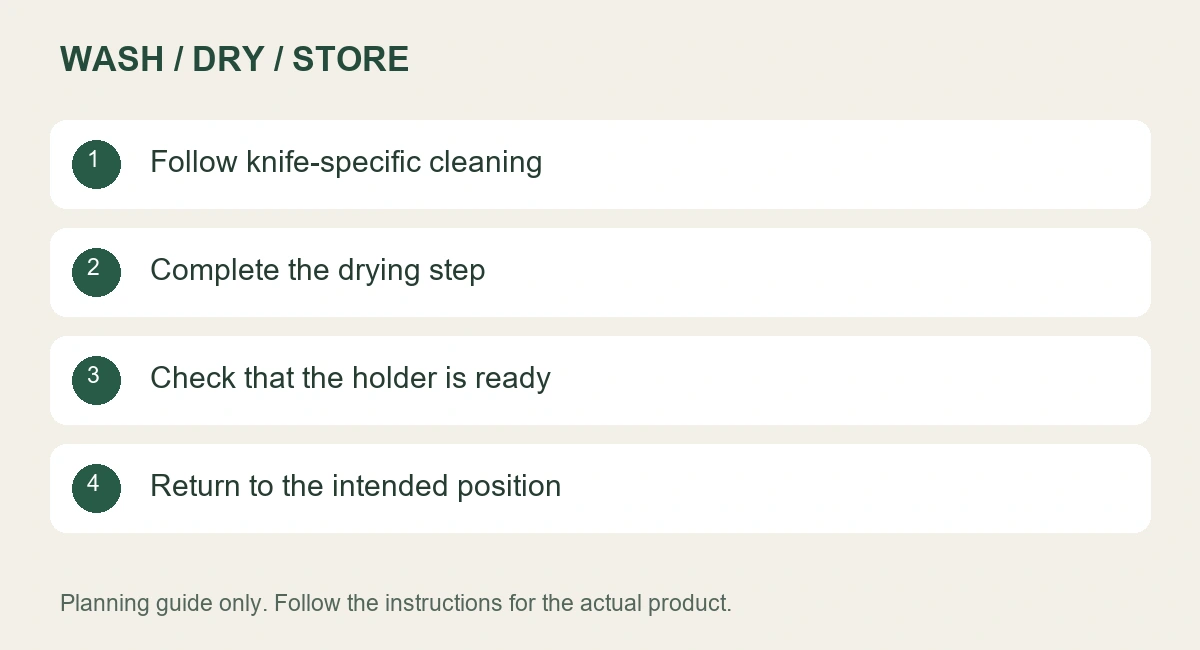
Illustrated planning checklist; follow model-specific instructions.
Give drying its own place in the sequence
Dry the knife according to its care instructions before returning it to storage. Do not treat a magnetic board as a drying rack. Check the handle and the area where it meets the blade as well as the broad blade surface.
Choose a clear working area for this step, away from the clutter of an ongoing wash-up. Handle the knife carefully following the maker’s guidance; a hurried routine around exposed edges is not improved by storing the knife sooner.
Return it to a prepared position
Before replacing the knife, make sure its intended position is clear and the holder is ready for use. If the face needs cleaning, put the knife in appropriate protected temporary storage first. Follow the holder’s separate material and finish instructions.
| Stage |
Practical objective |
| Clean |
Remove food residue using knife-specific guidance |
| Dry |
Complete the knife’s care process before storage |
| Check |
Confirm the holder and intended position are ready |
| Store |
Return the knife using the approved placement method |
Make the routine work for everyone
In a shared kitchen, agree whether the person washing a knife also dries and returns it. Keep the temporary storage location consistent. An unexplained knife beneath a cloth creates uncertainty for the next person using the counter.
Give each stage a clear beginning and end
Arrange the routine around the busiest cleanup period in your household. If dishes accumulate after a shared meal, reserve a clear place for attending to knives before the surrounding area becomes crowded. Agree who completes that task and where the knives remain protected if it cannot be finished immediately. This makes the sequence practical in the kitchen you actually use, rather than relying on an always-empty sink or counter.
The preparation stage ends when the knife is no longer needed for the current task. The cleaning stage follows the knife maker’s instructions. Drying is completed before storage, and storage means returning the knife to an appropriate protected or approved position. Treating these as distinct stages helps prevent a half-cleaned or damp knife from being placed wherever there happens to be room.
You do not need a complicated system of labels. A clear work area, a known temporary storage method and an agreed return position can be enough. The important point is that another household member can understand where the knife is in the process without lifting a towel or searching through washing-up items.
Prepare the area before handling the knife
Make sure the approved cleaning materials and a suitable drying cloth are available before beginning. Clear unrelated items from the immediate work area. This reduces the need to set a knife down unexpectedly while reaching into a cupboard or moving dishes. Keep the edge visible and follow the manufacturer’s handling guidance throughout the process.
If the sink is full of other items, reorganise the task before cleaning the knife. Do not place it out of sight among plates or utensils while waiting for space. A separate, appropriate protected location is preferable to an improvised hiding place that another person may not recognise.
Match the routine to the actual knife collection
Different knives may have different care requirements, particularly where handle materials or finishes differ. Keep those instructions available rather than assuming that a routine used for one knife applies to every item. The holder’s material instructions are another separate reference, even if the knife and holder both include wood or metal.
When someone else helps with cleanup, explain any special requirements before they begin. It is easier to clarify the approved process in advance than to discover afterwards that an unfamiliar knife or holder component has received an unsuitable treatment. Avoid using general product-category labels as a substitute for model-specific care information.
Keep temporary storage genuinely temporary
If the holder must be cleaned before the knives can be returned, decide where the knives will remain protected during that work. Finish the holder’s approved cleaning and drying process before reloading it. Do not return knives to a damp surface simply to clear the counter more quickly.
Once the holder is ready, return each knife to its intended position and clear away the temporary arrangement. Leaving several unofficial storage places in use can make the next meal’s routine harder to understand. Consistent final positions are especially useful when more than one person cooks or washes up.
Inspect changes without assuming their cause
If you notice a mark on a blade or the holder, inspect both items and review the relevant care guidance. A visible mark does not by itself identify the source or the appropriate treatment. Avoid escalating immediately to abrasive pads, polishing compounds or strong household cleaners in an attempt to make the surface look new.
Describe the material, model and observed change to the supplier when the instructions do not resolve it. Take photographs in a suitable setup with the knives protected. If damage affects intended use, stop using the affected item or position while obtaining guidance rather than treating a cosmetic cleaning attempt as a functional repair.
What if cleanup is interrupted?
Leave the knife in an appropriate protected location that other household members recognise, then resume the remaining care steps before returning it to normal storage. Avoid concealing it beneath a cloth or leaving it in washing-up water. The interruption should not make its location uncertain.
Does a faster routine mean skipping drying?
No. Improve the arrangement of the work area and the availability of the approved cleaning materials instead. Keeping the stages convenient can save unnecessary movement while preserving the care instructions for the knife and holder. Returning an item sooner is not useful if its required preparation for storage is incomplete.
Does a clean-looking holder need disinfection?
Appearance alone does not establish hygiene, and an unapproved disinfectant may damage a finish. Follow applicable product care instructions and ask the supplier about any specific cleaning requirement.
Can I use the same cleaner on the knife and holder?
Only if each manufacturer permits it for the relevant surfaces. See the magnetic holder cleaning guide for the questions to check before choosing a method.
Knife Storage for a Kitchen Shared by Two Cooks
AI-generated concept illustration; not a THMINS product photograph, installation diagram or performance test.
In a kitchen used by two cooks, good knife storage needs to work from more than one person’s position. A holder that is convenient for one chopping board may force the other cook to reach across a work area. Begin with where each person prepares food, then choose an accessible storage location.
Map the movements before moving the knives
With knives safely stored, walk through an ordinary meal together. Identify where vegetables are prepared, where dishes are washed and which routes cross. Mark a possible holder footprint with paper and check whether either person would need to reach past the other’s hands.
The objective is a predictable route to the right handle. It is not to place the holder at the exact geometric centre of the counter.
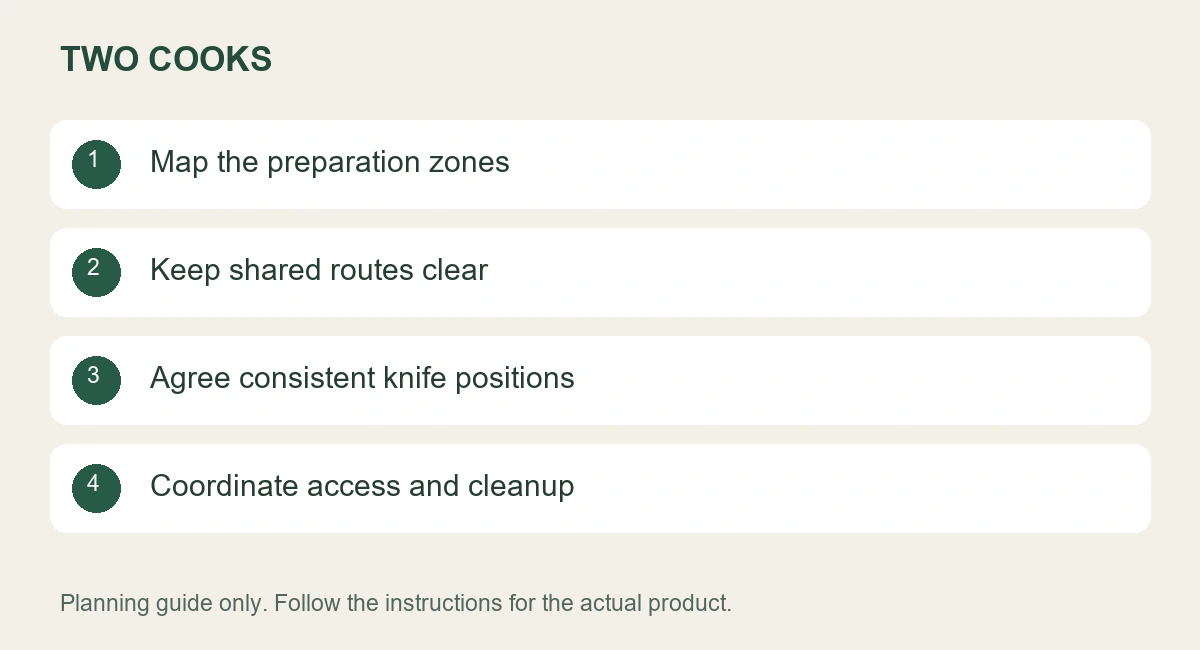
Illustrated planning checklist; follow model-specific instructions.
Give commonly used knives consistent positions
Agree where each knife is returned after cleaning and drying. Keep the arrangement simple enough that a missing knife is noticeable. Avoid placing unrelated utensils between blades merely because there appears to be unused space.
If both cooks use a similar knife at the same time, plan storage for the actual two knives rather than relying on one position that is repeatedly shared. Check handle access and blade separation for the complete layout.
Examine an island from both sides
A double sided holder can be approachable from different directions, but the outside face may also be accessible to visitors. Consider normal household movement and choose another storage arrangement where exposed knives are unsuitable.
| Shared activity |
Layout question |
| Two chopping boards in use |
Can each cook reach storage without crossing the other workspace? |
| Washing and returning knives |
Is the return path clear of food preparation? |
| Opening drawers |
Does movement interfere with the holder? |
Keep cleanup responsibilities clear
Agree who returns knives and when the holder is emptied for cleaning. Do not leave an unannounced knife under a towel or among washing-up items for the other person to discover. Each knife should have a known protected location during cleanup.
Separate preparation zones from shared routes
Include the tasks that happen between meals, such as putting groceries away or making drinks. A route that is clear during dinner preparation may be busy at breakfast when cupboard doors and appliances are in use. Choose a storage position that remains understandable across those routines. If one location serves only a single activity well, compare it with another before treating it as the permanent shared arrangement.
Two people can work at adjacent counters without needing separate complete kitchens. Identify which spaces are used for chopping, washing, cooking and setting down hot or bulky items. Then mark the routes between those tasks. A knife holder should not require one cook to reach across the other’s chopping board or stand in the path of a pan moving from the hob.
Plan with the knives safely stored and use a paper footprint for the proposed holder. Each cook can walk through the movements using empty hands. This reveals access conflicts without turning the planning exercise into a test around exposed blades. If the route is awkward even without knives present, reconsider the location before loading a holder there.
Make the layout understandable to both people
Agree on a simple order for the knives and keep it consistent. Organising by the knives you both recognise is usually more useful than a display arranged solely for visual symmetry. When one cook changes a position, tell the other rather than assuming the new arrangement is obvious from a distance.
Pay attention to differences in how each person approaches the holder. Height, preferred hand and working position can change which handles are easy to reach. Choose an arrangement that allows both people to follow the manufacturer’s handling guidance. Do not invent a different removal technique for one person merely to preserve an inconvenient layout.
Decide how a knife is requested during cooking
If one person is using the knife the other needs, agree to communicate rather than reaching into the active work area. Keep the storage routine separate from handing tools between people. A clear verbal request and a deliberate pause are easier to coordinate than an unexpected reach across a chopping board.
Return a finished knife to its appropriate cleaning or storage stage rather than leaving it on an unfamiliar part of the counter. The next person should not need to determine whether a knife hidden among ingredients is clean, in use or waiting to be washed. Consistent locations reduce that ambiguity.
Avoid treating the holder as a shared utensil rack
In a busy kitchen, small tools can gradually accumulate wherever a gap appears. Keep the magnetic holder limited to the items the manufacturer intends it to store. Scissors, peelers and sharpening tools may have different shapes and attachment requirements. Their attraction to a surface alone does not make them suitable additions.
Provide another organised location for those utensils so they do not compete with knife handles. This also makes it easier to see when a knife has been returned to the wrong position or when the layout has become crowded. A holder that is simple to understand is more useful during cooking than one that displays every metal tool available.
Review the arrangement after a normal meal
After using the kitchen together, discuss where either person had to wait, reach around an obstacle or move another item. Review the empty layout before making changes. You may discover that moving a drying rack or relocating a chopping board solves the issue without changing the knife storage at all.
Repeat the review when a new appliance or knife changes the workspace. Shared kitchens evolve, and a previously clear access route can become crowded gradually. Treat the holder’s location as part of the overall preparation arrangement rather than a decorative object that must stay in one place permanently.
What if guests help with cooking?
Explain the knife positions and handling instructions before they use the storage. If a guest is unfamiliar with the holder, do not assume they know the intended removal movement. Where several people create an unsuitable access pattern, reorganise the task or use an appropriate protected storage arrangement.
Can we use opposite faces at the same time?
Follow the product’s instructions and avoid assuming that two storage faces imply simultaneous use by two people. Coordinate access so one person’s movement does not surprise the other. Ask the supplier about the intended use if this is an important requirement for your kitchen.
Should each cook have a separate holder?
Only if the kitchen has suitable space and the separate arrangement improves access. Two crowded blocks can create more obstacles than one carefully located storage system.
Does visible storage suit every household?
No. Consider everyone who can access the kitchen, not just the two cooks. Protected storage with appropriate access controls may be more suitable. For placement fundamentals, see the small kitchen placement guide.
Moving a Magnetic Knife Holder to a New Kitchen
AI-generated concept illustration; not a THMINS product photograph, installation diagram or performance test.
A magnetic knife holder used successfully in one kitchen still needs a fresh placement check after a move. Counter depth, cabinet height and the route around a cooking area can change how the same holder works. Plan transport and the new layout as separate tasks.
Remove knives before packing the holder
Do not transport a loaded magnetic block as if magnetic attachment were travel protection. Remove each knife using the intended method and pack it in suitable protective storage for transport. Keep sharp items identifiable and separated from loose household objects.
If you are using a removal service, ask about its packing requirements for kitchen knives. Do not assume a towel wrapped around a blade is equivalent to purpose-made protection.
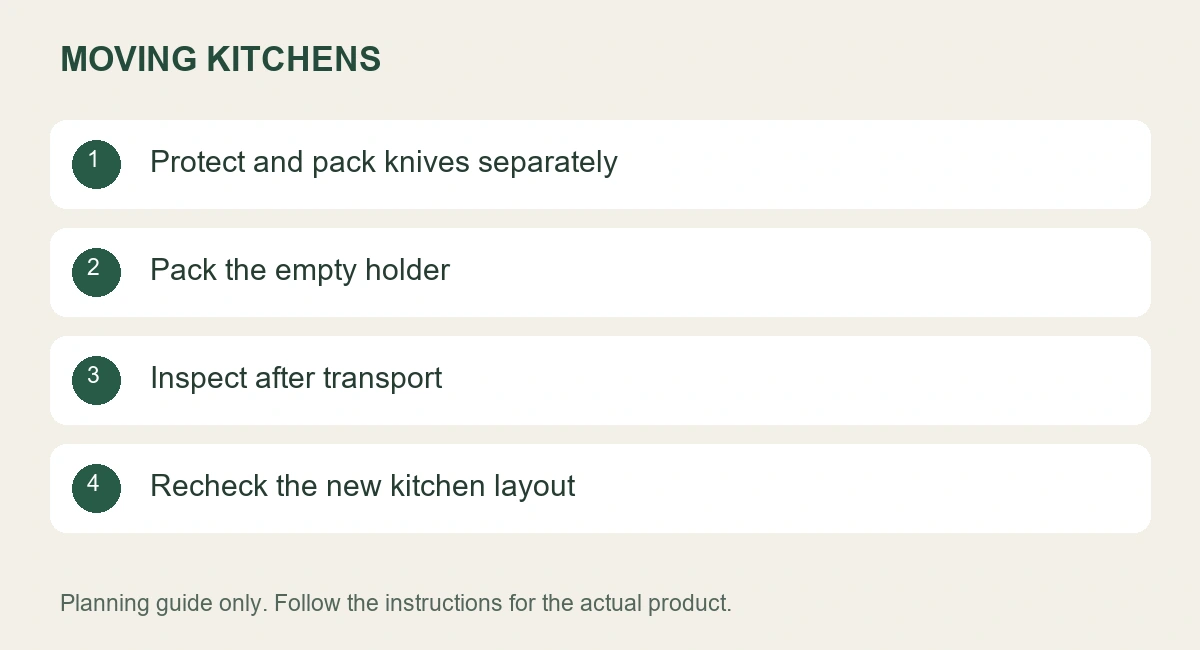
Illustrated planning checklist; follow model-specific instructions.
Prepare the holder according to its instructions
Clean and dry it as directed before packing. Retain any approved removable components and hardware together in a labelled packet. Leave fixed guards and structural parts assembled unless the instructions permit dismantling.
Protect the surfaces and projecting parts during transport. Keep the manual or a copy of the model information accessible so you can check setup requirements without searching every box.
Inspect before reusing it
After unpacking, examine the empty holder for damage, missing feet or loose parts. Resolve any problem with the supplier before loading knives. A familiar product should receive the same condition check as one that has just arrived.
Reassess the new location
| New kitchen feature |
What to check |
| Shallower counter |
Complete base footprint and working room |
| Lower cabinet |
Handle height and removal path |
| Different preparation area |
Access without crossing other tasks |
| Nearby backsplash |
Rear access for double sided storage |
Use a paper footprint to compare positions while the knives remain packed. The spot that looks most similar to the old kitchen may not provide the best access in the new one.
Make a packing list before moving day
After unpacking, store the transport protection where it can be found for future use. A labelled location for blade guards, packing inserts and instructions makes the next move easier to prepare. Check their condition before reusing them rather than assuming that surviving one journey means they remain suitable indefinitely. Keep these packing accessories separate from the ordinary cooking area once the kitchen is organised.
Keep the packed kitchen knives separate from the tools used to open moving boxes. A kitchen knife should not become an improvised packing tool simply because it is the first sharp object available. Prepare an appropriate box-opening tool and return it to its own location after use. This keeps unpacking activity separate from the process of preparing the knives and holder for their intended kitchen roles.
List the knives and their protective storage, the holder, any approved removable parts and the instructions. Keep this list with the kitchen packing information so you can check that every component reaches the new home. A small packet of hardware is easy to misplace if it is packed separately without a label identifying the product.
Prepare the protective storage before removing knives from the holder. This avoids creating an intermediate pile of exposed blades while searching for packing materials. Use products intended to protect the knives during transport and follow any requirements from the removal service. Keep the packed knives identifiable to the adults handling the kitchen boxes.
Separate transport requirements from countertop use
Magnetic attachment in an ordinary kitchen setting is not a transport restraint. Movement in a vehicle, changes in orientation and contact with other packed objects are different conditions from a holder resting on a counter. Do not leave knives attached because they seemed secure during everyday cooking.
The holder also needs its own protection. Pack it so its finish, feet and guards are not pressed against hard objects or used to support other boxes. Follow the manufacturer’s guidance for any parts that can be removed, and do not dismantle a fixed structure just to reduce packing volume.
Keep moisture out of the packing process
Complete the approved cleaning and drying process before packing either the knives or holder. Avoid wrapping a recently cleaned item while moisture remains in joints, guards or contact areas. Follow the relevant care instructions for each material rather than applying one cleaning routine to the entire set.
If unpacking will be delayed, retain the manufacturer’s storage guidance with the items. A moving box is a temporary transport arrangement, not automatically an appropriate long-term storage environment. When you unpack, inspect the condition before returning the items to everyday service.
Rebuild the kitchen routine in stages
First identify the new preparation area, sink and appliance positions. Next, compare possible storage locations using the empty holder or a paper footprint. Finally, confirm knife fit and access before placing the collection into its normal positions. This order avoids organising the knives around a location that later proves unsuitable for cooking.
Do not let the first available patch of counter become the permanent location simply because it was convenient during unpacking. Moving day creates temporary piles and unfamiliar routes. Reassess once the main appliances and everyday utensils are in their intended positions.
Consider changes in the household as well as the room
A move may introduce shared cooking, an open-plan island or a different route through the kitchen. These changes can affect who approaches the holder and from which direction. An arrangement that was tucked against a wall in the old home may expose a second face toward seating in the new one.
Evaluate whether visible, accessible knife storage remains appropriate for everyone who uses the space. If it does not, choose a protected arrangement with suitable access controls. Keeping a familiar product does not require keeping the same storage method when the household circumstances have changed.
What if a foot is missing after the move?
Keep the holder out of use until the supplier identifies the correct replacement or other approved resolution. Do not level the base with folded paper or an unrelated pad. The intended contact between the base and counter is part of the product’s setup, not merely an appearance detail.
Can I reuse the old wall mounting hardware?
Check the rack instructions and the new wall construction before any installation. Hardware that was suitable for one surface may not be appropriate for another, and its condition also matters. Obtain the required mounting guidance instead of assuming that moving the same rack means repeating the same installation.
Can I remove a wall rack and use it as a countertop holder?
Only if it is explicitly designed for that configuration with the required parts. A wall rack should not be treated as a freestanding block by adding an improvised support.
Should the old arrangement be recreated exactly?
Retain a familiar knife order if it remains suitable, but adapt the location to the new space. Use the holder size checklist to check footprint, height and surrounding clearance together.
Checking a New Magnetic Knife Holder Before First Use
AI-generated concept illustration; not a THMINS product photograph, installation diagram or performance test.
Before placing knives on a new magnetic holder, check that the delivered product matches the model you ordered and that its instructions are available. This is an inspection and setup process, not a reason to perform an improvised strength test.
Inspect the empty holder
Unpack it on a clear surface and keep the packaging until you have checked the contents. Look for visible cracks, damaged guards, loose components or missing feet. Compare the supplied parts with the assembly instructions.
If something appears damaged, photograph it and contact the seller before loading the holder. Do not glue a loose component or replace missing hardware with an improvised substitute to start using it immediately.
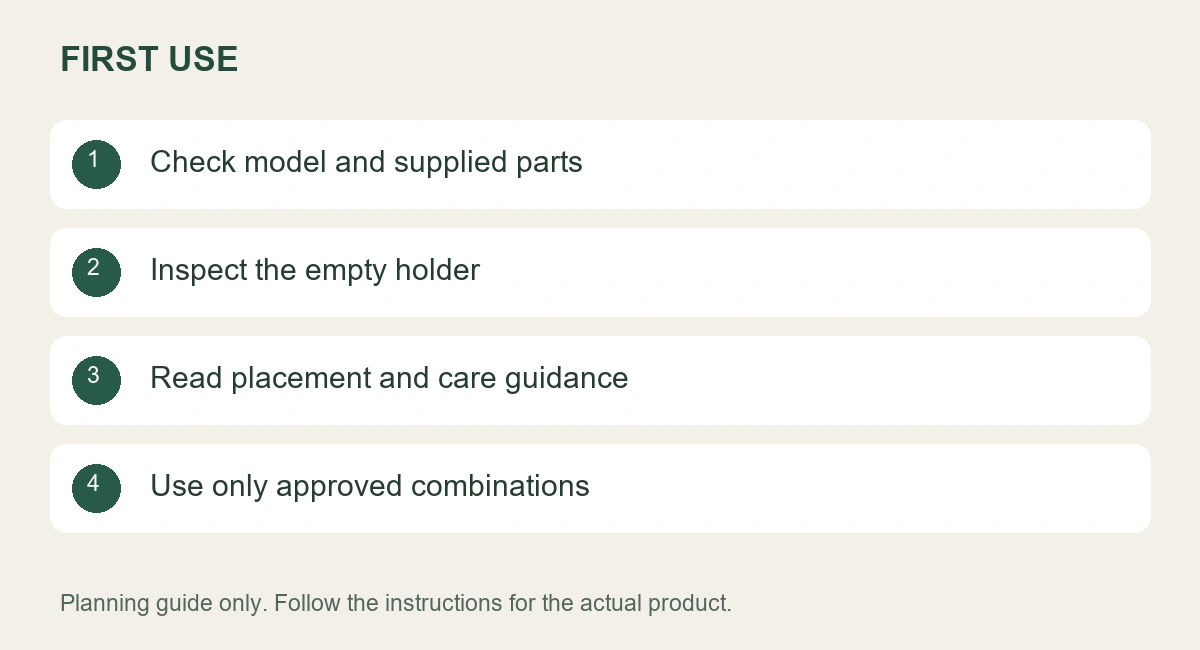
Illustrated planning checklist; follow model-specific instructions.
Confirm what the instructions cover
Check the intended knife types, placement, removal method, cleaning guidance and any assembly requirements. A product photograph is not a replacement for these details. Ask the seller to clarify a missing instruction while the holder is still empty.
If assembly is required, follow the specified sequence and hardware. Avoid guessing tightening requirements or dismantling parts that the manual identifies as fixed.
Prepare the counter location
The complete base should sit as intended on a suitable level surface. Check that the feet are present and that the surrounding counter is clean and dry. Open nearby doors and drawers and consider normal movement around the preparation area.
| Before loading |
Confirm |
| Product identity |
Correct model and supplied parts |
| Condition |
No visible damage requiring seller review |
| Instructions |
Placement, removal and care are understood |
| Location |
Complete footprint and access are suitable |
Follow the intended first use
Load only compatible knives in approved positions. If a knife slips or the holder moves unexpectedly during ordinary handling, stop using that combination and contact the supplier. Do not repeat an unstable movement to see whether it happens again.
Adding weights, shaking the block or pulling until it tips does not provide a useful household acceptance check. A relevant demonstration identifies the holder and knife and shows normal use under stated conditions.
Separate delivery condition from product suitability
Keep a brief record of the intended arrangement as well as the delivery condition. Note which knives you plan to store and where the holder will stand. If a later support question arises, these details make it easier to explain what has changed since first use. A new knife, a different counter location or a missing component can be relevant without implying that any one of them caused the issue.
A holder can arrive undamaged and still be unsuitable for the knife or location you intended. Delivery inspection asks whether the supplied product is complete and in acceptable condition. Suitability assessment asks whether the approved configuration works with your knives and kitchen. Keep these questions separate when communicating with the seller so the issue can be understood accurately.
For example, a missing foot is a condition or completeness issue. A block that is too tall for your cabinet space is a fit issue. A knife whose compatibility has not been confirmed is a separate product-use question. Describe the specific observation rather than summarising every concern as weak magnets or poor quality.
Keep the first-use area clear
Choose a clear work area for unpacking and reading instructions. Remove packaging pieces from the intended counter location and ensure the complete base can sit as designed. Keep the knives in their existing protected storage until the holder has been inspected, assembled where required and placed appropriately.
Avoid combining unpacking with a busy meal preparation session. Time pressure can encourage skipping a missing instruction or placing a knife before checking its position. A short separate setup period makes it easier to identify questions while the holder is still empty and the packaging is available.
Review the supplied parts against the actual model
Use the instructions for the exact model, particularly if a product family includes several sizes or guards. A picture of another variation may show components that are not part of your order. Compare the model identifier, included hardware and assembly steps before deciding that a part is missing or that an extra component should be fitted.
If the documentation is unclear, ask the seller for the correct manual. Do not borrow assembly details from a visually similar holder. Small differences in bases, guards or fasteners can change how components are intended to fit, even when two products appear nearly identical online.
Make a clear support record without recreating a problem
If you notice damage or unexpected movement, record what happened in ordinary use and stop using the affected combination. Photograph visible condition issues with the holder empty. Include the model, the knife details where relevant, the counter surface and the recommended action you were following. This gives support staff useful information without requiring another attempt at an unstable movement.
Keep your original photographs and the order details. If you share an image publicly, remove personal information from labels or paperwork. Avoid turning a support request into an improvised demonstration with added loads or repeated tipping; that can introduce a different problem from the one you first observed.
Know what the initial check does not prove
A successful first placement does not establish suitability for every knife in the collection or every possible position. Continue to use only the combinations permitted by the product information. Check new knives separately when the collection changes, and reassess the location after moving the holder or changing the surrounding appliances.
Similarly, a visually intact surface does not establish a particular resistance to scratches, stains or cleaning chemicals. Follow the actual care instructions rather than testing the finish with household products. Ordinary care and approved use are more useful than attempts to discover the limits of the product at home.
When should I discard the packaging?
Check the seller’s current return instructions and keep the packaging long enough to resolve any initial condition or fit question. Do not assume a particular return period from another retailer or an older order. The relevant policy is the one that applies to your purchase.
Should I load every knife immediately?
Follow the model’s setup and loading instructions. Confirm compatibility and intended positions before adding knives, and do not use a maximum-capacity arrangement as a first-use test. The objective is a suitable everyday layout that you understand and can access comfortably.
What should I record for a support request?
Provide the order or model identification, a description of the issue and clear photographs taken without creating a hazardous setup. Keep personal details out of any public review images.
Should I wash the holder before use?
Follow its first-use cleaning instructions. Do not assume immersion or dishwasher cleaning is suitable. The cleaning guide introduces the material questions to check.
Organising a Mixed Knife Collection on a Magnetic Holder
AI-generated concept illustration; not a THMINS product photograph, installation diagram or performance test.
A collection assembled over several years rarely matches the uniform knives in a product photograph. Your chef knife, small utility knife and long slicer may have very different handles and blade shapes. Plan their storage individually before deciding how many belong on a magnetic holder.
Make a short inventory
List the knives you use regularly, along with model names and available dimensions. Separate everyday tools from knives used only for an occasional task. This helps you reserve accessible storage for the knives you actually reach for.
Use manufacturer dimensions where available. Keep the knives protected while preparing paper outlines or a layout sketch; there is no need to crowd exposed blades together to estimate a capacity.
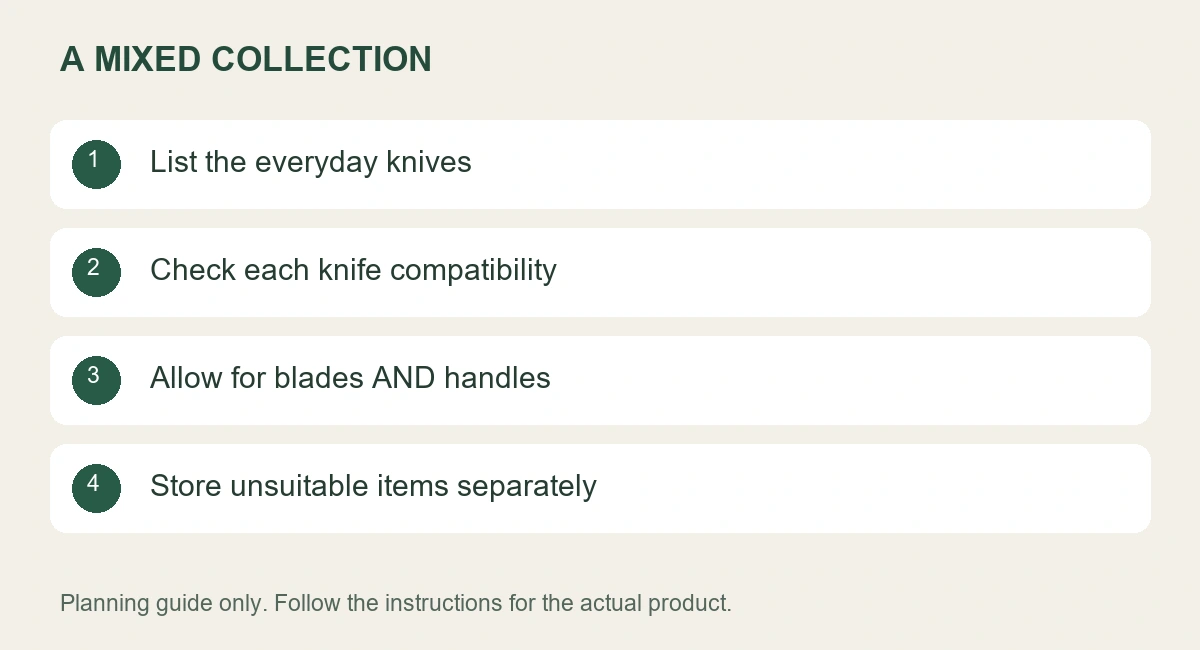
Illustrated planning checklist; follow model-specific instructions.
Check compatibility knife by knife
Do not assume a holder suits every knife because one chef knife attaches well. Confirm the blade material and model with the knife and holder manufacturers. A ceramic blade, for example, does not provide the same magnetic attachment as a compatible steel blade.
Shape matters as well. A projecting bolster or unusual handle may affect how the knife sits in the intended storage position. Do not modify the knife or add loose magnets to compensate for an unsuitable fit.
Arrange around usable access
| Knife feature |
Storage question |
| Long blade |
Does the tip clear the base in the approved position? |
| Wide blade |
Is adjacent storage still accessible? |
| Bulky handle |
Can you grip it without touching another blade? |
| Unusual profile |
Does it sit as the holder is designed to support it? |
There is no need to create a perfectly symmetrical display. A practical layout gives every stored knife a clear position and keeps the intended contact areas unobstructed.
Keep a second storage option when needed
An incompatible or awkwardly shaped knife can remain in a suitable sheath, insert or other protected storage recommended for it. One deliberate secondary location is preferable to forcing the entire collection onto one holder.
Divide the collection by use before dividing it by size
Include the knives used by other household members in this inventory. A tool that you rarely reach for may be part of someone else’s daily routine. Discuss which knives belong in the shared accessible positions before reorganising the collection. Keep separate protected storage easy to identify so an occasional tool is not mistaken for a missing everyday knife or returned to an unsuitable magnetic position after washing.
Start with the knives used during an ordinary week. A chef knife, utility knife and bread knife may all be regular tools, while a carving knife or specialist blade may be used much less often. Put the regular group into the initial layout, then consider whether adding the occasional tools would compromise access. This prevents the least-used item from determining the footprint of the entire everyday storage system.
Do not assume that a matched set needs to remain together in one display. It may be more practical to keep several regular knives accessible and the remaining pieces in suitable protected storage. Conversely, a collection from different manufacturers can work together if each knife is compatible and the complete layout is appropriate for the holder.
Make an inventory that a supplier can answer
For each knife, record the manufacturer and model, blade length, widest blade dimension and any unusual handle or bolster feature. Include weight when it is known and relevant to the supplier’s assessment. Use product specifications where possible, and identify estimates as estimates rather than presenting them as measured facts.
Add a photograph of the knife only if it can be taken in a suitable protected setup. There is no need to arrange the entire collection with edges exposed for an attractive group photograph. The purpose is to communicate fit details, not to demonstrate attachment before compatibility has been established.
Think about the space occupied by handles
Two narrow blades may fit close together on a board while their handles prevent comfortable gripping. Conversely, a broad blade may require generous width even when its handle is small. Plan around the envelope of the entire knife in its intended position, not only the most convenient dimension from the specification.
Handle shape also affects how a person approaches it. Consider the actual grip and removal motion recommended for the holder. A layout that requires pushing another handle aside or passing fingers close to an adjacent edge is a reason to reduce crowding or use another storage position.
Keep collection changes deliberate
When adding a new knife, repeat the compatibility and layout checks instead of placing it in the first visible gap. The available gap may lie outside the intended attachment area or may be needed for access to a neighbouring handle. Adding one knife can change the practicality of the whole arrangement even when the overall count remains below an advertised capacity.
If a new blade replaces an older everyday knife, decide where the older one will go. Leaving redundant tools on the holder can gradually turn a clear layout into a crowded display. Reassess what you actually use rather than buying a larger holder automatically whenever the collection grows.
Keep materials and care instructions distinct
A mixed collection may include knives with different cleaning and maintenance requirements. Store them only after completing the care appropriate to each knife. Do not assume that every handle tolerates the same treatment or that the holder’s maintenance instructions apply to the knives resting on it.
Keep product care information accessible, particularly for an unusual finish or handle material. If one knife requires a separate protected storage arrangement, label or organise that location clearly enough that another household member does not return it to the magnetic holder by habit.
What if the knife attaches but sits at an unexpected angle?
Do not treat attachment alone as confirmation of suitable fit. Check whether the knife is in the intended position and whether its shape prevents the approved contact arrangement. Stop using that combination until the manufacturer or supplier clarifies it; avoid adding spacers or loose magnetic components.
Should the most expensive knife get the largest gap?
Plan suitable access and separation for every knife. Price does not determine the clearance required by its shape or the compatibility of its blade. An expensive knife may deserve particular care, but a lower-priced tool should not be crowded into a position that is unsuitable to use.
Can I include scissors or a sharpening tool?
Only when the holder is intended for that item and the manufacturer confirms the placement. Attraction to a surface alone does not establish suitable storage for a tool with different geometry.
How much space should I reserve for future purchases?
Plan around an identifiable addition rather than a vague maximum collection. If you expect to buy a long slicer, its likely height and handle access matter more than an extra nominal knife position.
Use the size guide to turn the inventory into questions for the supplier.